
Embed a Roleplay Agent in Salesforce
Embed a Roleplay Agent in Salesforce
You can drop a single roleplay agent straight into a Salesforce Lightning page as a live practice panel. Reps open the record they're working on and practice a call, chat, or video session with the agent without leaving Salesforce or switching tabs.
Under the hood this is a plain, sandboxed <iframe> pointed at one agent. If you're looking to embed into a website, an SCM tool, an LMS/LXP, or a docs/wiki tool instead of Salesforce, see Embed a Roleplay Agent Anywhere.
This is different from Salesforce and Outdoo AI, which syncs meeting notes and call data into Salesforce records. That integration and this embed can be used together, but setting one up doesn't set up the other.
Before you start
- You need the Admin or Manager role in Outdoo to generate an embed code.
- The agent must be published and Active — drafts and agents still being created can't be embedded.
- The agent must be a single-persona agent. Multi-persona agents aren't supported in the embed yet.
- The agent can't have a workflow/screen-capture step attached. Workflow capture needs the Outdoo browser extension, which can't run inside an iframe.
- Your workspace needs the Roleplay app enabled.
- In Salesforce, you'll need System Administrator access to Setup to create a Visualforce page, update Trusted URLs, and edit the Lightning page.
If an agent doesn't meet the first four conditions, the Embed agent option won't appear in its menu.
Step 1: Get the embed code
- Go to Roleplay → Agents.
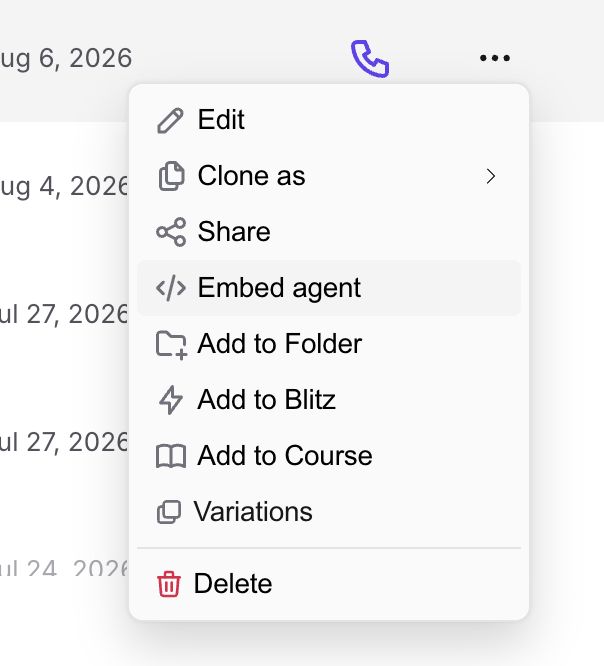
- Find the agent, open its ••• menu, and select Embed agent.
- Optionally set a Width and Height (defaults to 100% / 100%).
- Click Copy iframe HTML.
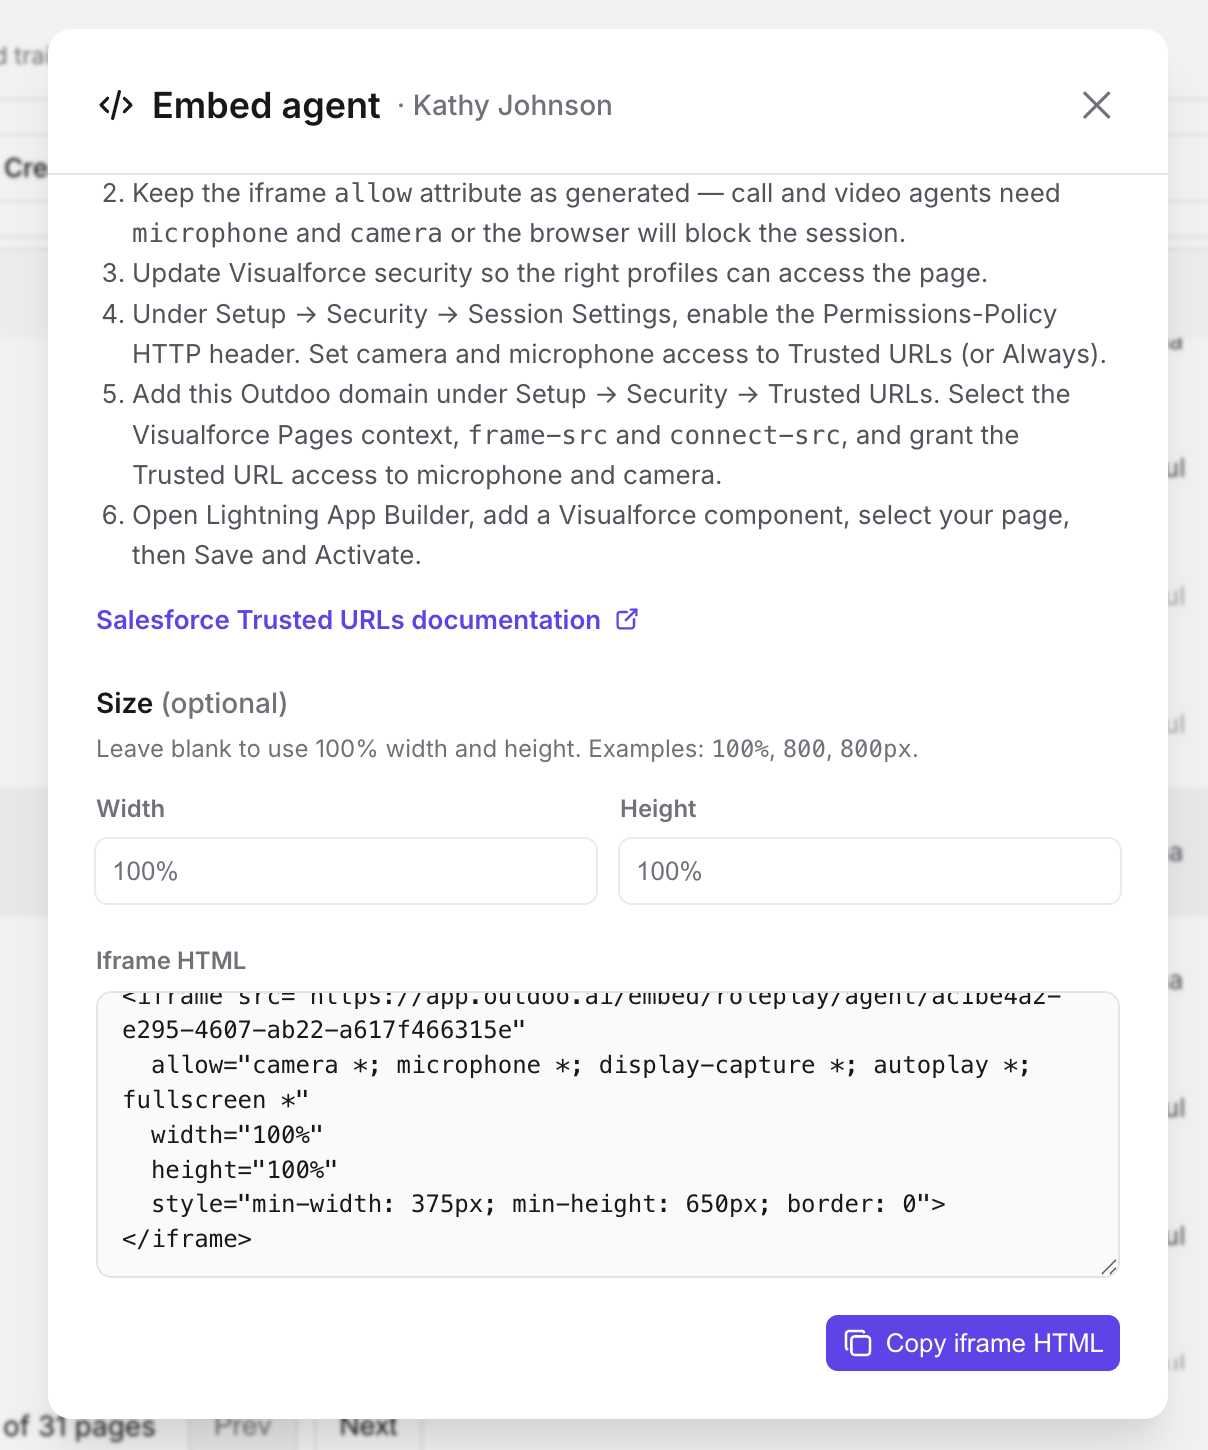
The copied snippet looks like this:
<iframe src="https://app.outdoo.ai/embed/roleplay/agent/<botId>"
  allow="camera *; microphone *; display-capture *; autoplay *; fullscreen *"
  width="100%"
  height="100%"
  style="min-width: 375px; min-height: 650px; border: 0">
</iframe>
Keep the allow attribute exactly as generated — call and video agents need camera and microphone access, and the browser blocks the session without it.
Step 2: Create a Visualforce page
- In Salesforce Setup, go to Custom Code → Visualforce Pages and click New.
- Give it a label, then paste the iframe HTML from Step 1 into the Markup field. Save.
- Open the page you just created and click Security. Add the profiles that should be able to access it, then Save.
Step 3: Allow camera and microphone through Salesforce's CSP
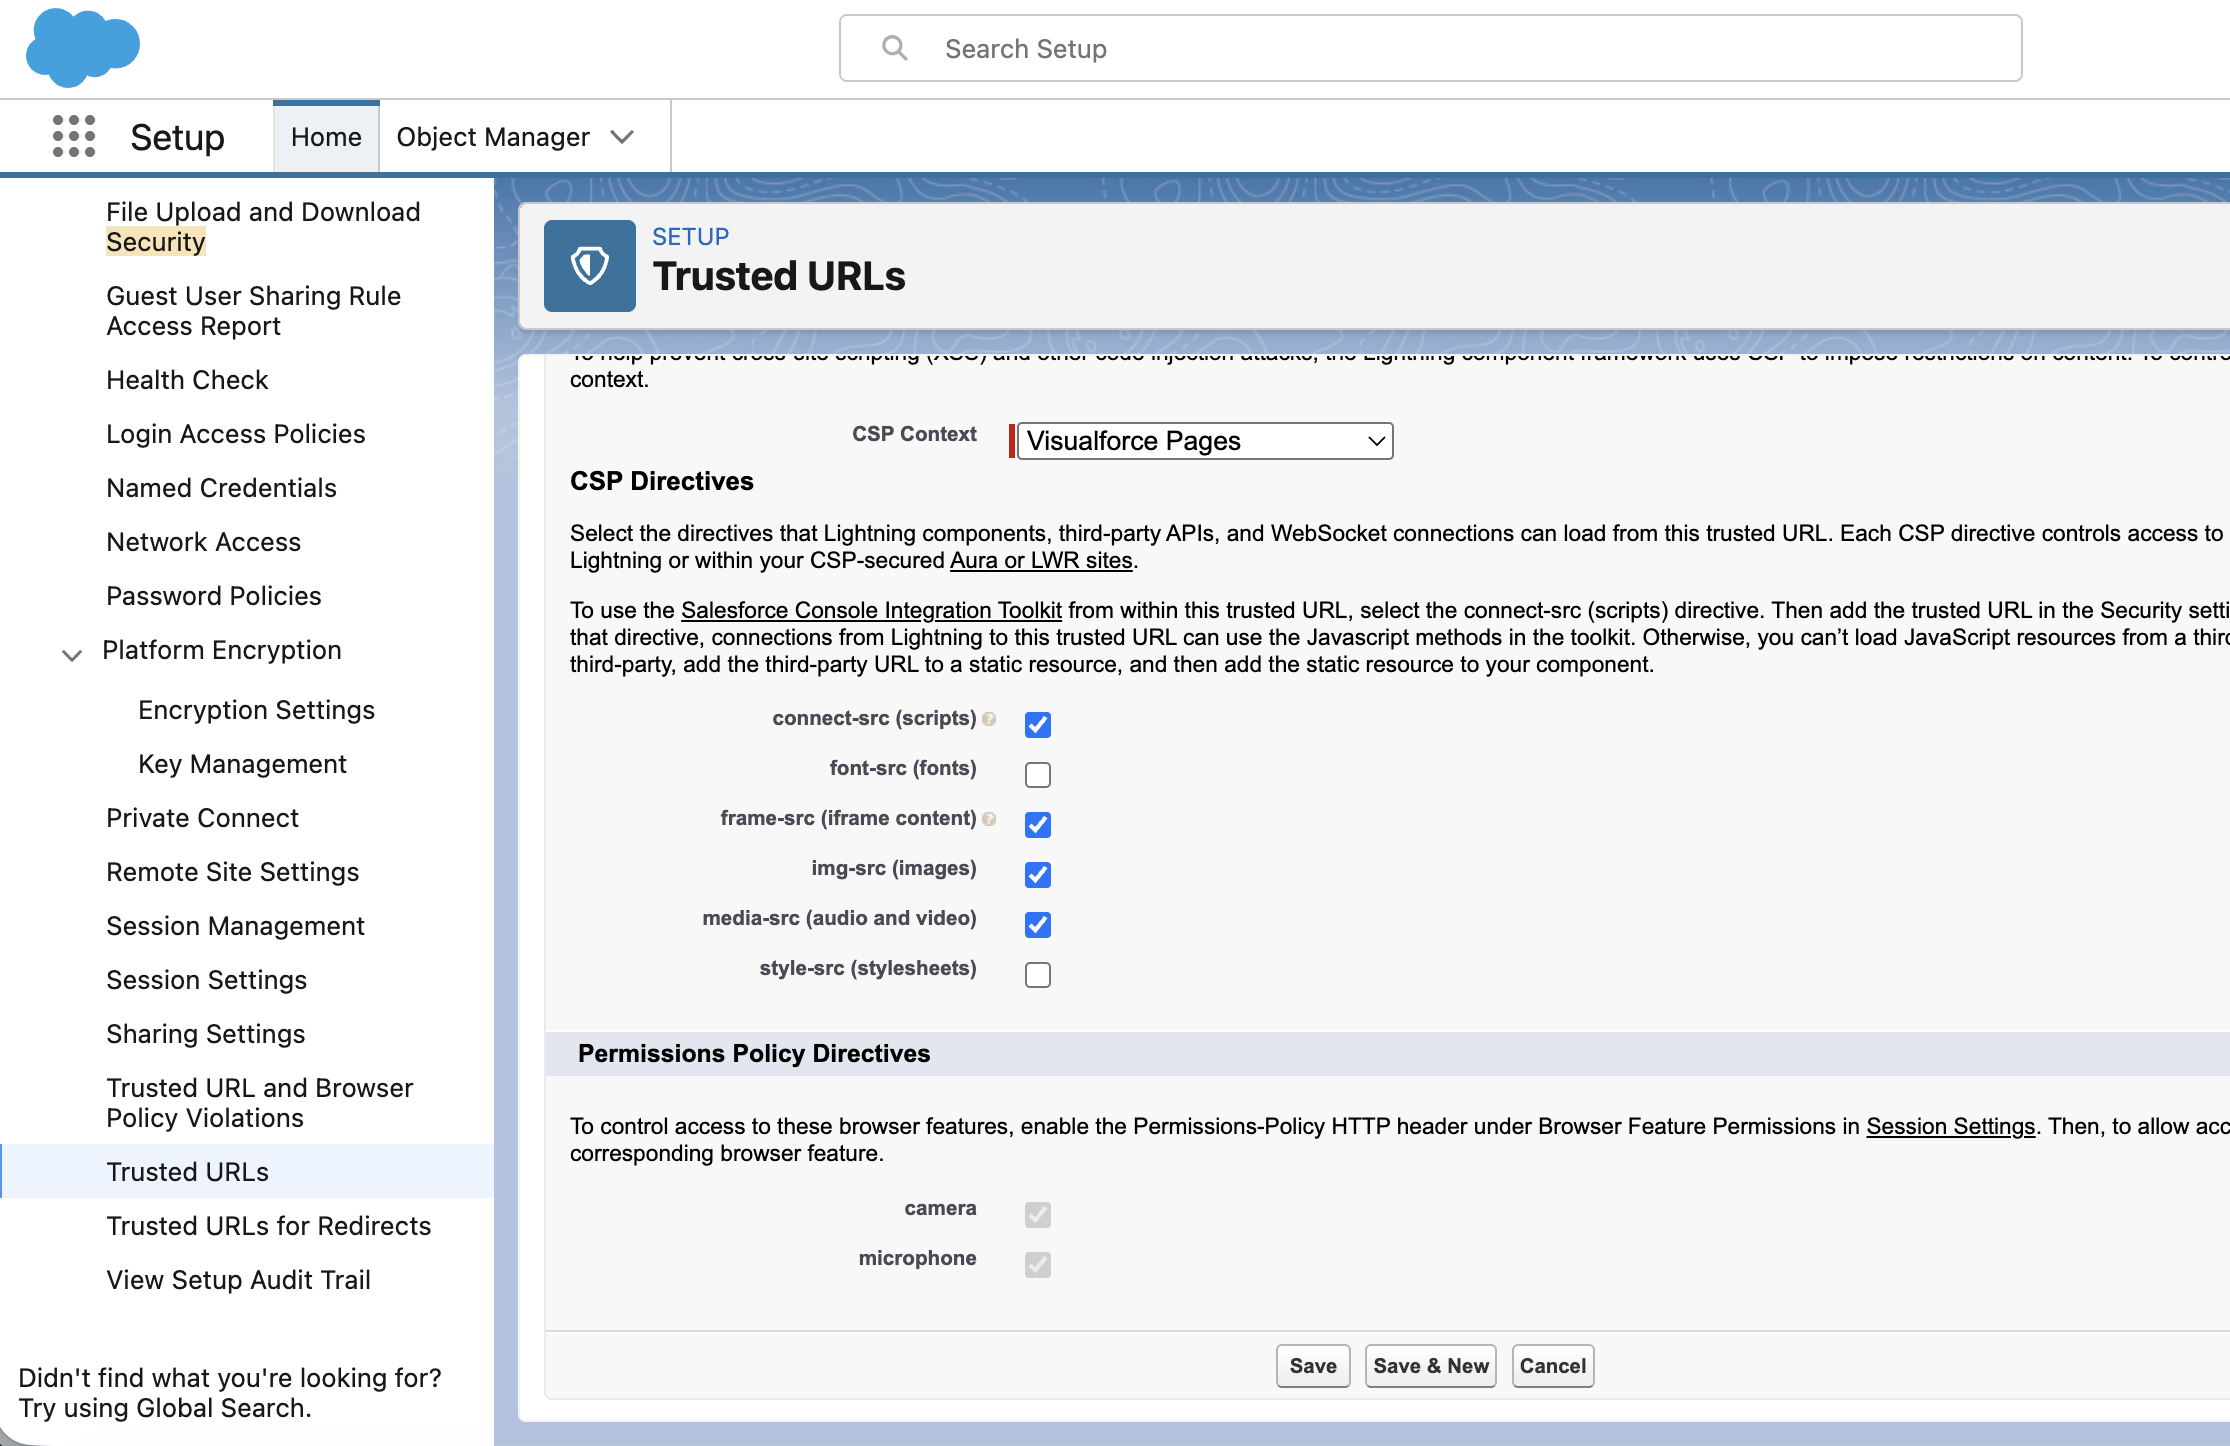
Salesforce blocks camera/microphone access and cross-origin frames by default, so two settings need to allow Outdoo through explicitly.
- Go to Setup → Security → Trusted URLs and click New Trusted URL.
- Set:
- URL — your Outdoo domain (for example
https://app.outdoo.ai) - CSP Context — Visualforce Pages
- CSP Directives —
connect-srcandframe-src - Grant access to — Camera and Microphone (skip this if you're only embedding a chat-only agent)
- Save.
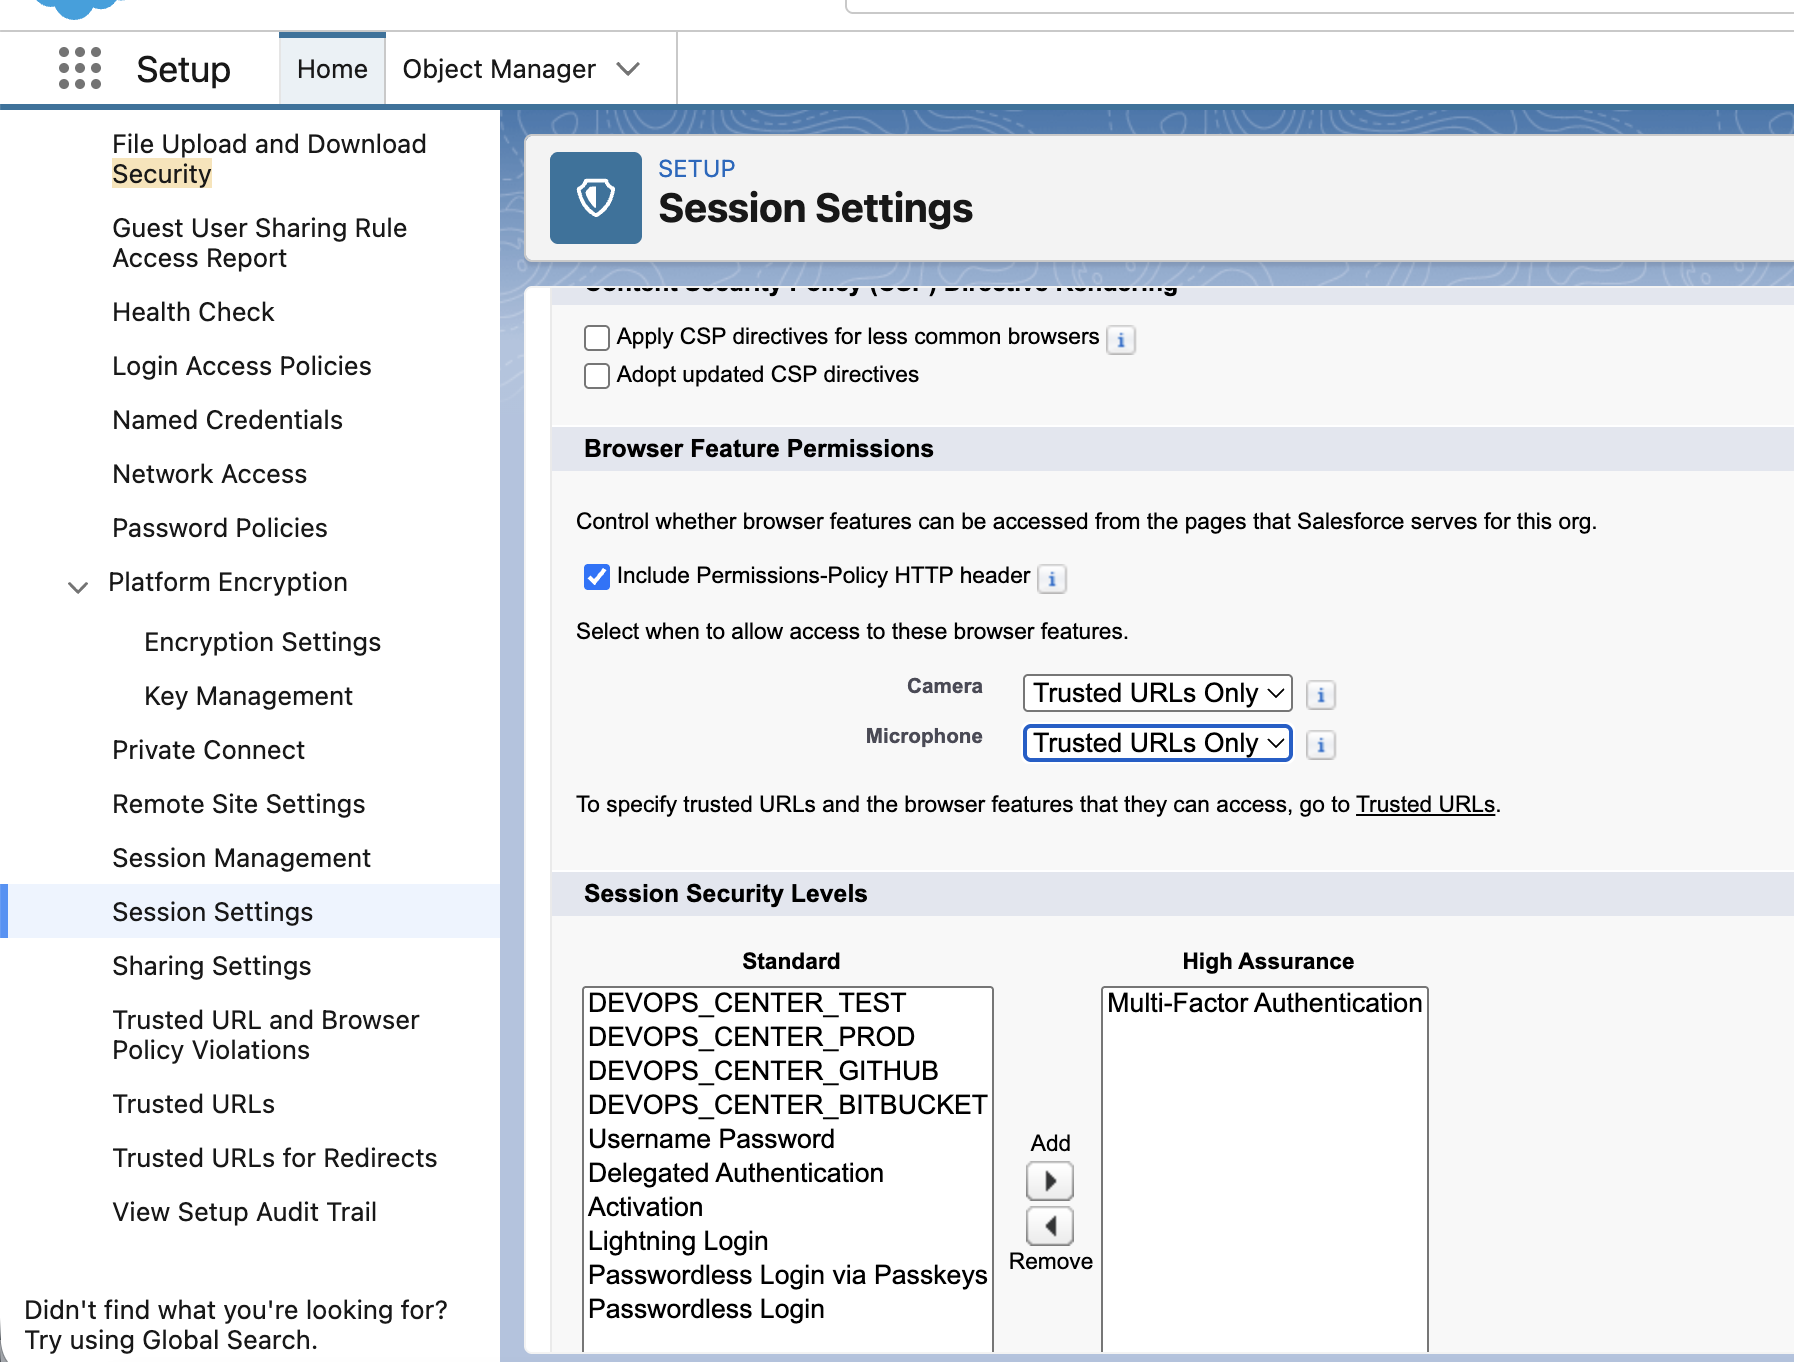
- Go to Setup → Security → Session Settings and enable the Permissions Policy HTTP header. Set camera and microphone access to Trusted URLs (or Always).
- Save.
Step 4: Add it to a Lightning page
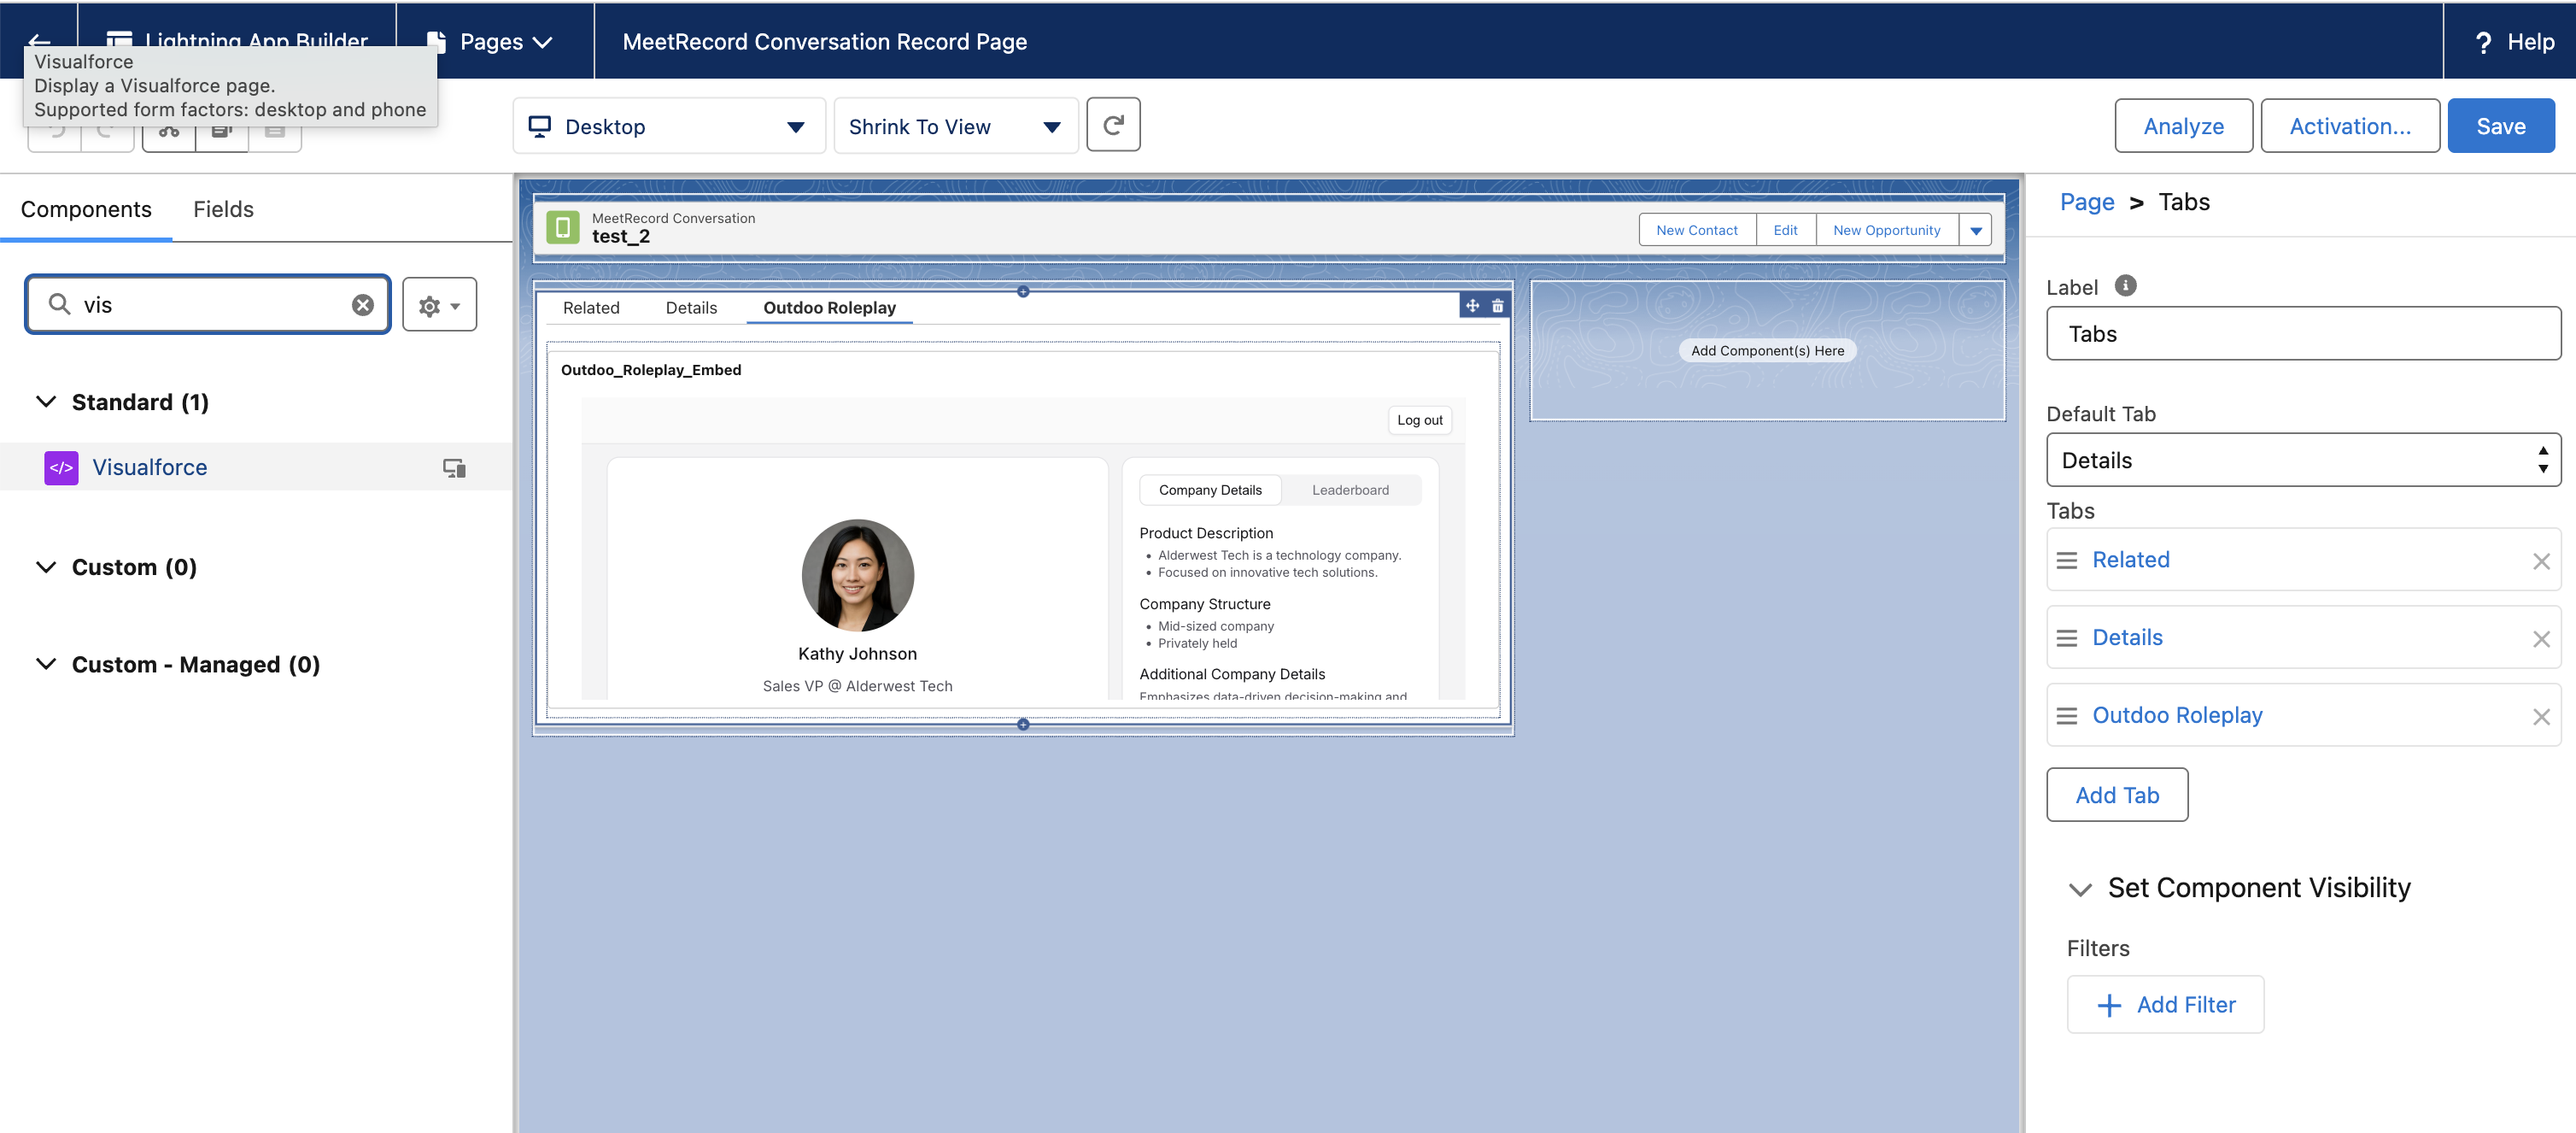
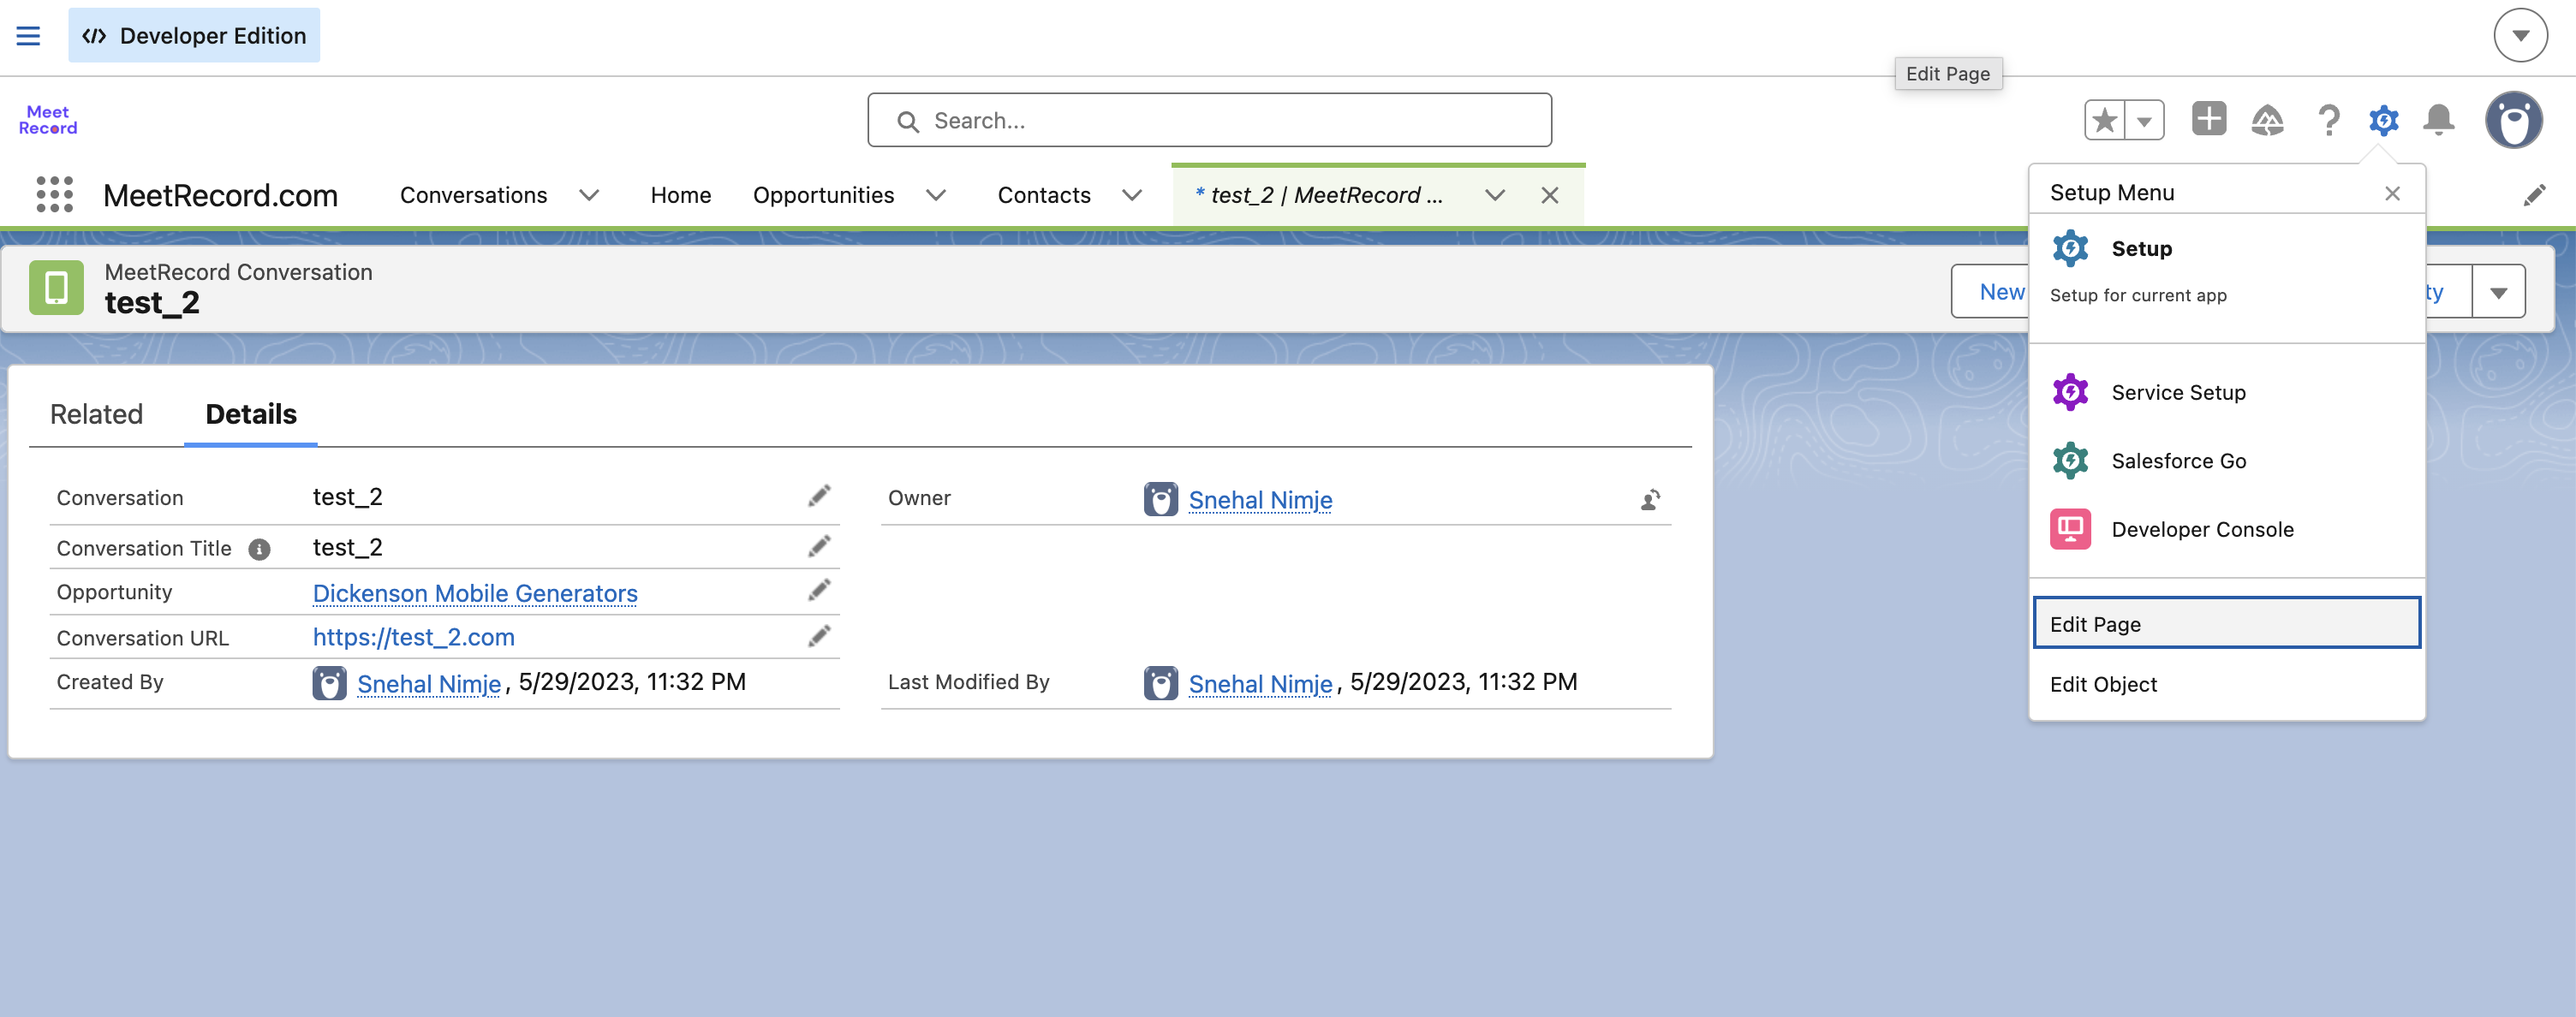
- Open the Lightning page in App Builder (the gear icon on the page, or Setup → Edit Page).
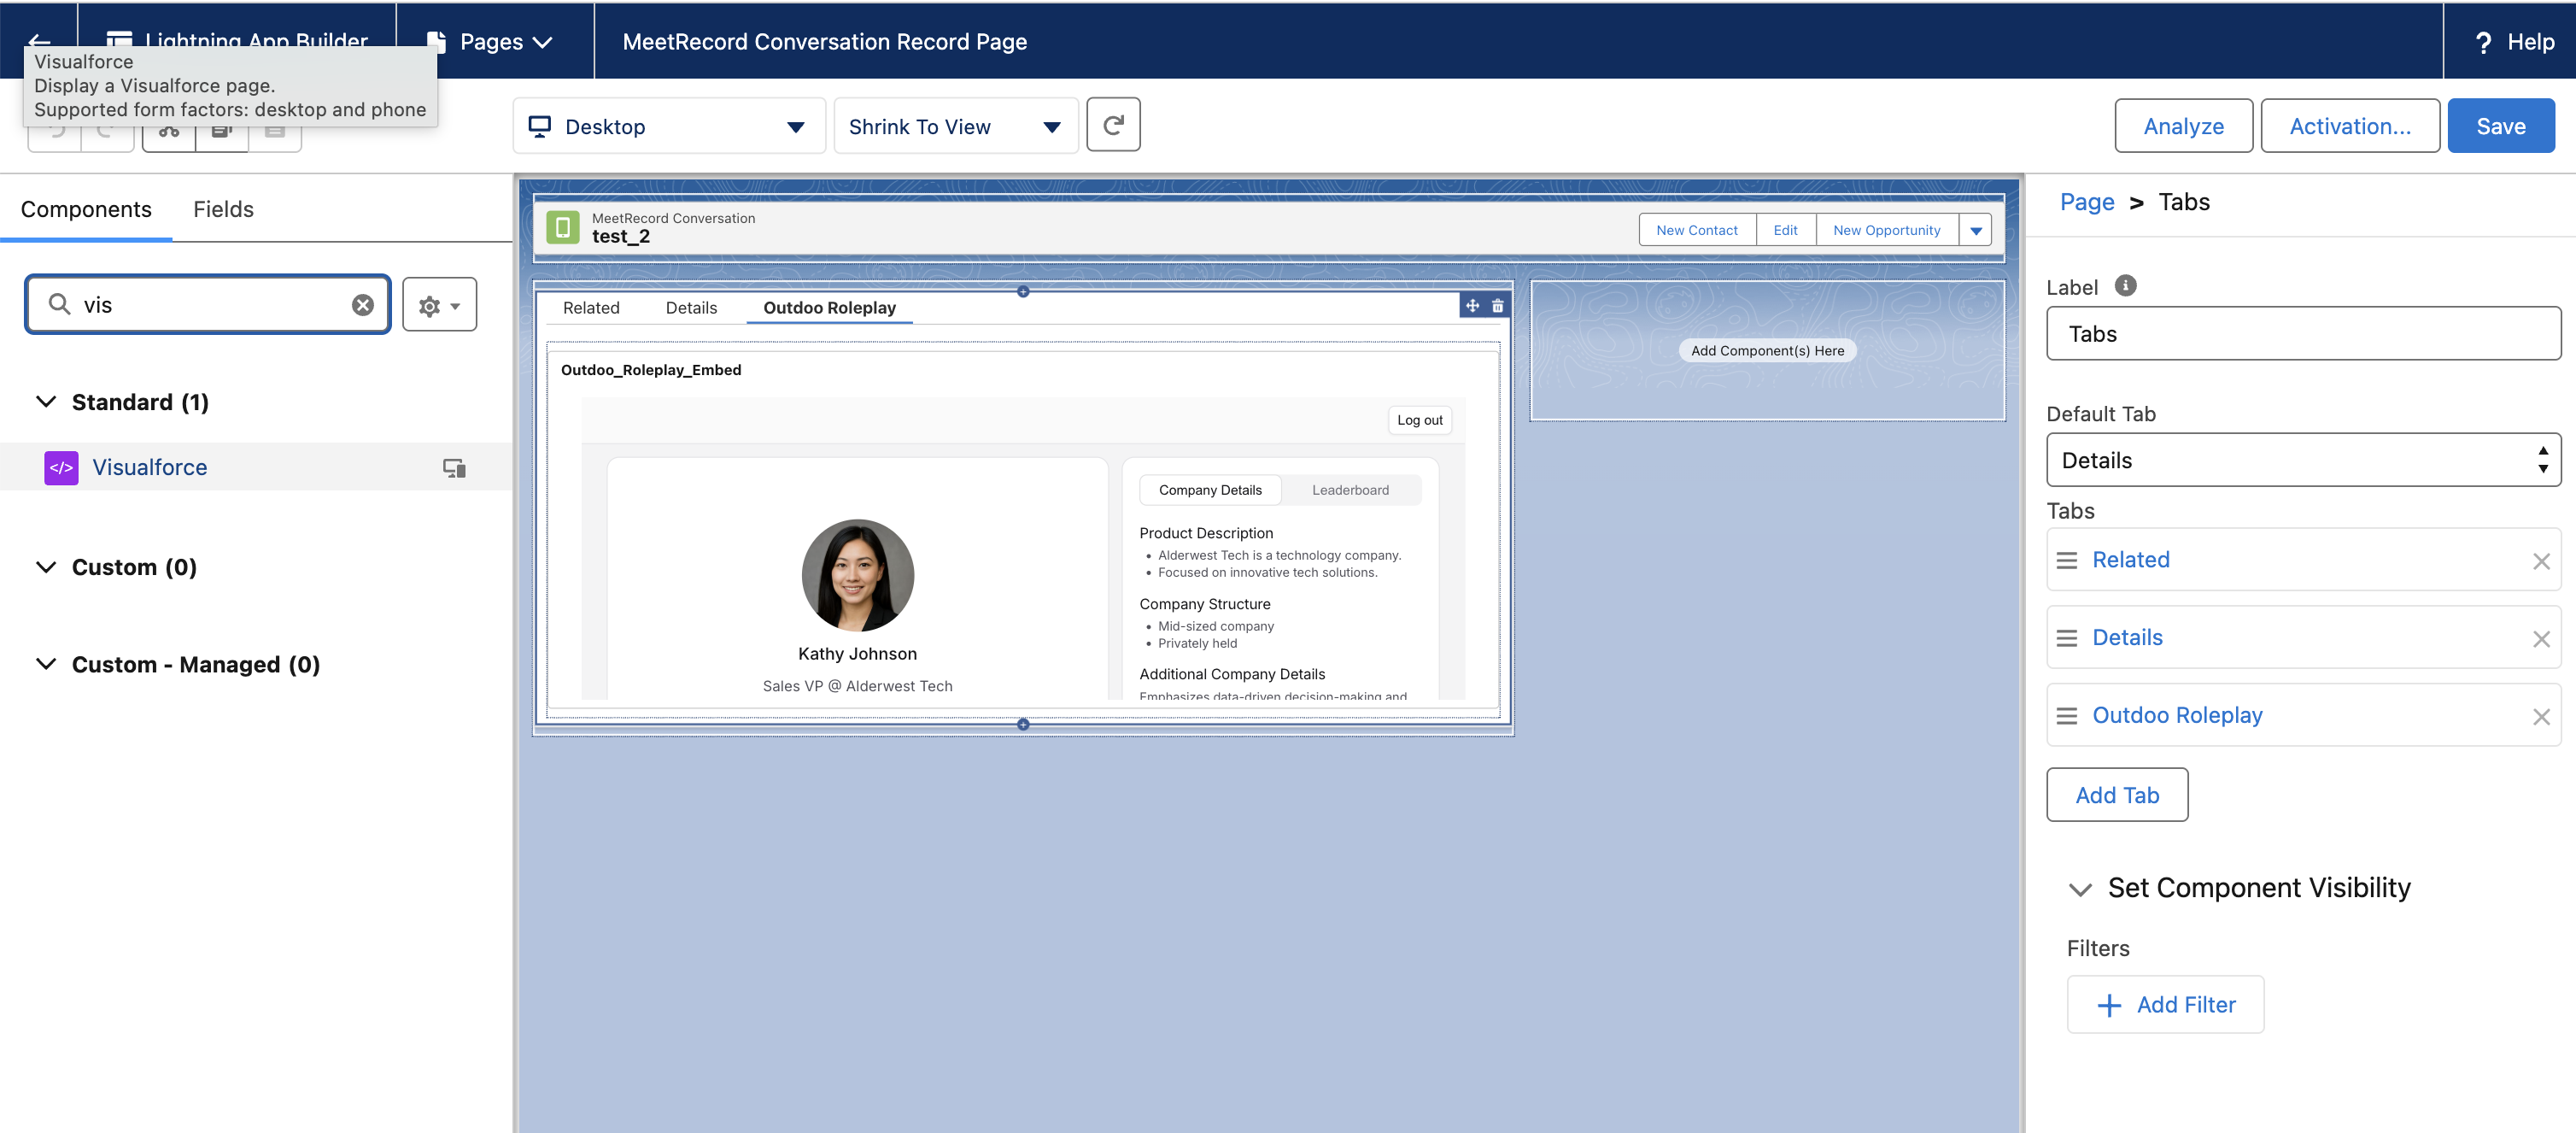
- Drag a Visualforce component onto the page.
- Select the Visualforce page you created in Step 2.
- Click Save, then Activate.
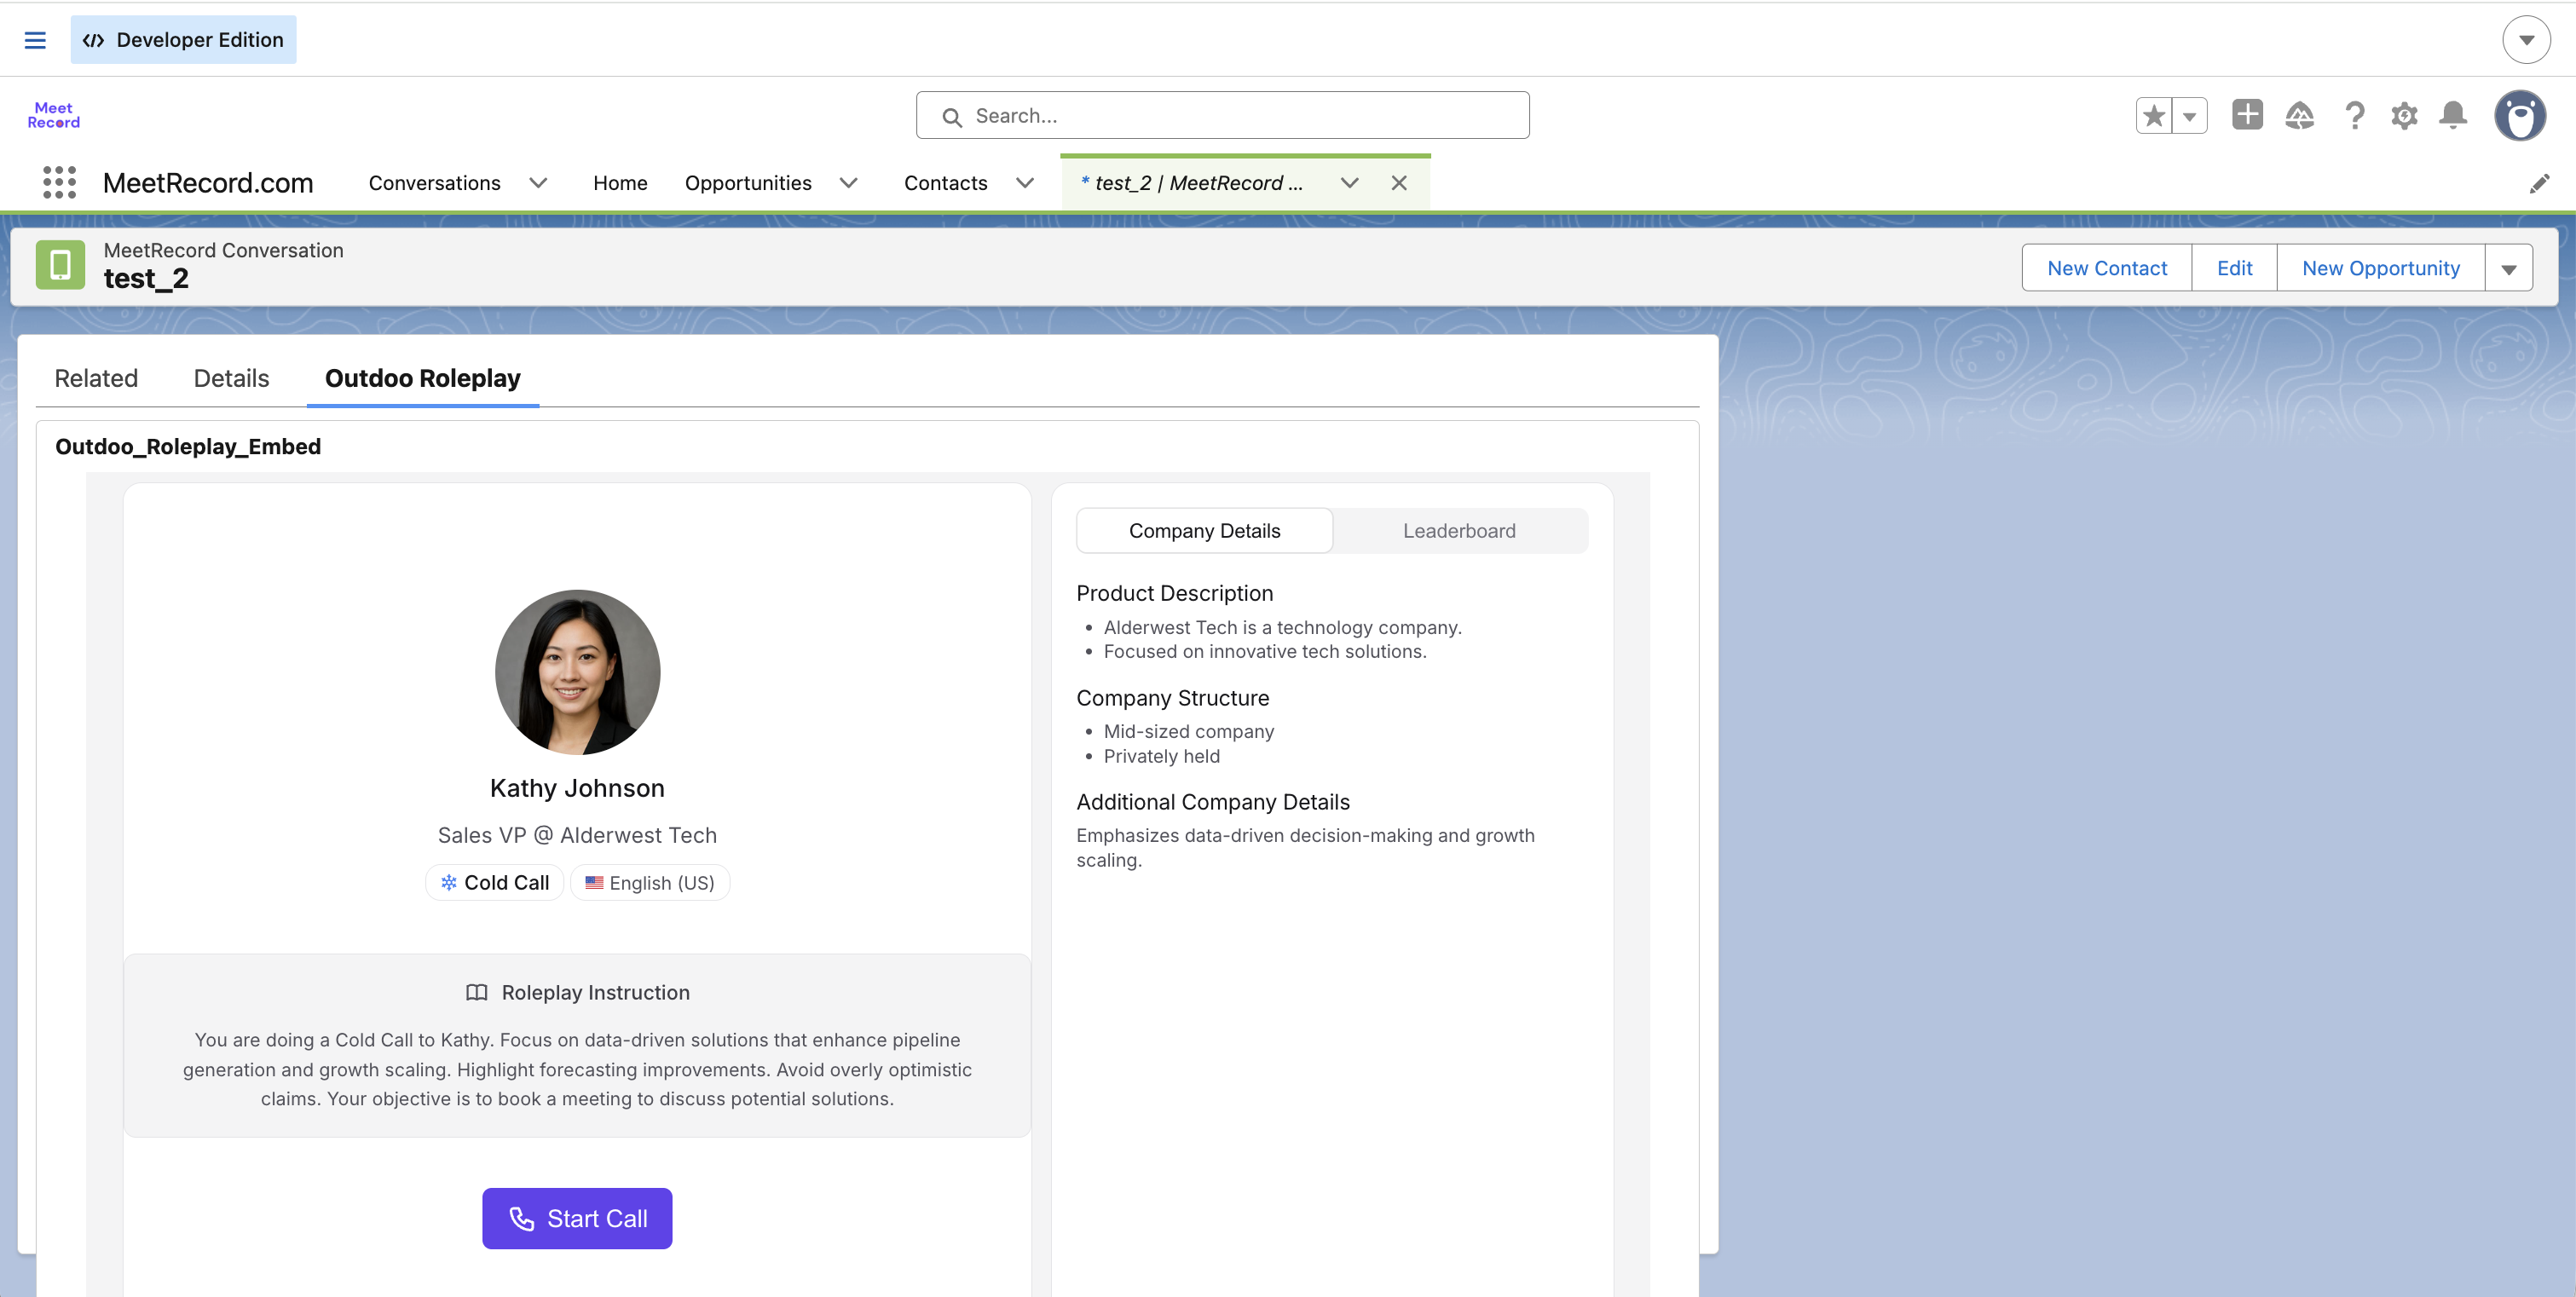
Once activated, the agent panel appears right on the record page:
Signing in inside the embed
The first time a rep opens the panel, they'll see a sign-in screen instead of the agent:
- Sign in with Outdoo signs them in without leaving the Salesforce tab.
- Sign in in new tab is a fallback for identity providers that block login pages from loading inside an iframe. After signing in there, the rep can return to the Salesforce tab.
Once signed in, the rep sees only that one agent — no navigation to the rest of Outdoo. They can start a call, chat, or video session depending on how the agent's channel is configured, and after the session ends they stay on the same panel to start another round or log out.
Troubleshooting
Banner says camera/microphone access is blocked. Session Settings' Permissions Policy header isn't enabled yet, or the Trusted URL isn't granted camera/microphone access. Reload the Lightning page after saving both settings — changes don't always apply to an already-open tab. Reps can click Use new tab for now to open the same agent outside the iframe while this is being fixed.
Sign-in screen loops or goes blank. The identity provider is refusing to render its login page inside a frame. Use Sign in in new tab instead.
"Agent cannot be embedded" in Outdoo. The agent is a multi-persona agent, or it has a workflow/screen-capture step attached — neither is supported in the embed yet.
"Access denied" inside the panel. The signed-in rep hasn't been shared on this agent, or isn't a member of the workspace it belongs to.
Related articles
- Embed a Roleplay Agent Anywhere
- Salesforce and Outdoo AI
- Create a Roleplay Agent Using Templates
- Roleplay Call Types