
Create and Manage Saved Filters
A saved filter keeps a set of filters under a name so you can apply it again in one click. You can also set up email or Slack alerts for a saved filter. This article covers saved filters on Real Calls > History.
Find the filter controls
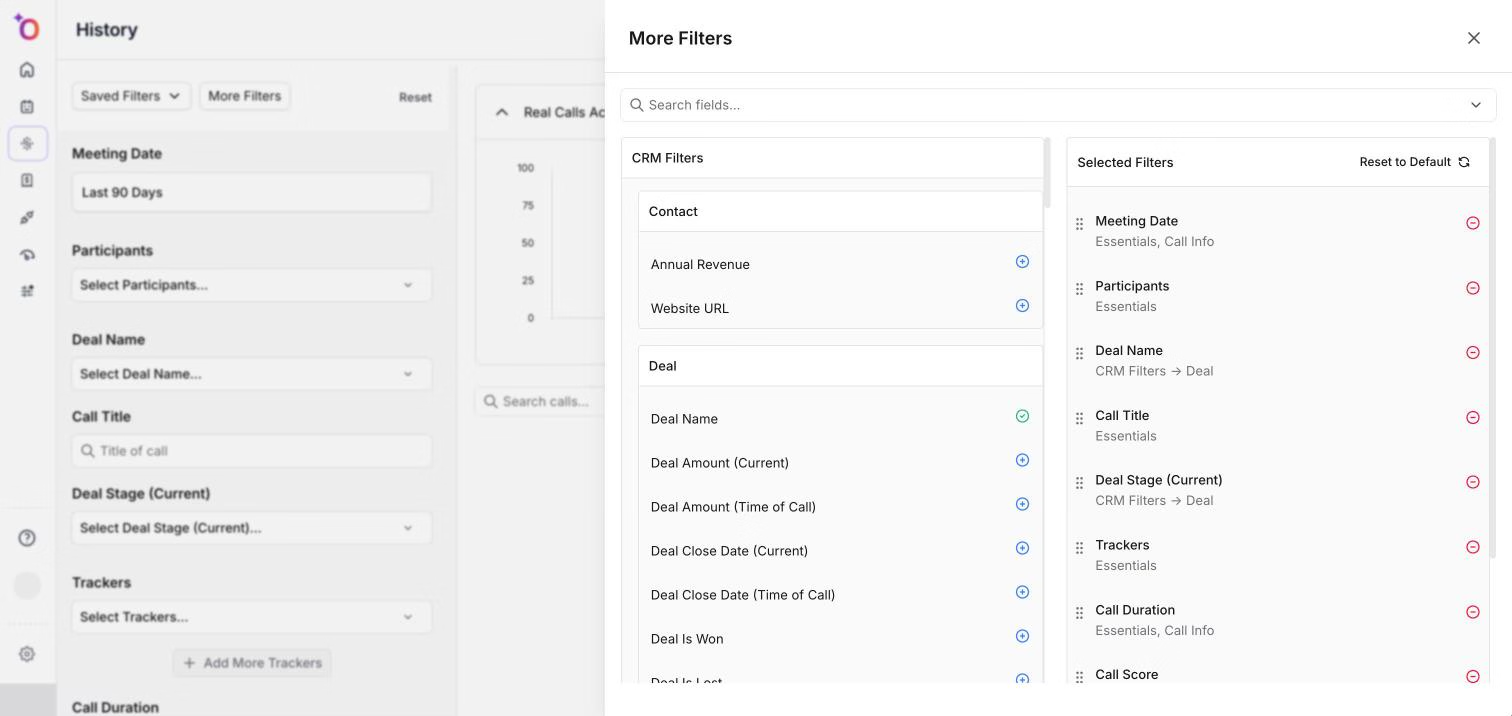
Go to Real Calls > History. The filter panel on the left has these controls at the top:
- Saved Filters opens the list of saved filters. Use it to apply, switch or manage them.
- More Filters opens a drawer where you can add more filters to narrow the call list.
- Reset appears once you have changed the filters. It sets all filters back to their defaults.

Create a saved filter
- Set up the filters you want in the filter panel.
- Click Create Filter at the bottom of the panel. The button only appears while you have filters applied and no saved filter is applied.
- In the Create Filter window, enter a Filter Name. This is required.
- Add a Description if you want. It can describe what the filter shows.
- Decide who can use it with Private Filter:
- Off: other team members can see and use the filter. This is the default.
- On: only you can use it. Other team members will not see it in the list of saved filters.
- Turn on Alerts if you want notifications. See Set up alerts below.
- Click Create Filter.
A confirmation message appears and the filter is added to your list.
Set up alerts
Turn on Alerts in the Create Filter or Edit Filter window, then choose how to send them:
- Slack sends alerts to a Slack channel.
- Email sends alerts to the email addresses you enter.
You only see the options your admin has enabled. If neither is available, the window says "Email and Slack alerts are disabled" and asks you to contact an admin. If you choose Slack and it is not connected, the window tells you to connect Slack, or to ask a workspace admin if you are not one.
Then turn on the schedules you want:
- Immediate Alerts
- Daily Alerts
- Weekly Alerts
For each schedule you turn on:
- With Email, type an address and press Enter, comma or space to add it. You can add more than one. An invalid address shows an error.
- With Slack, pick a channel from Select a Slack channel....
You can't save while a schedule is on but has no email address or Slack channel.
Apply a saved filter
- Click Saved Filters.
- Switch between Private and Public. Private shows filters only you can use. Public shows filters shared with your team.
- Use Search saved filters... to find a filter by name.
- Click a filter to apply it. Its filters load into the filter panel and the call list updates.
To stop using a saved filter, open Saved Filters and choose No Saved Filter.
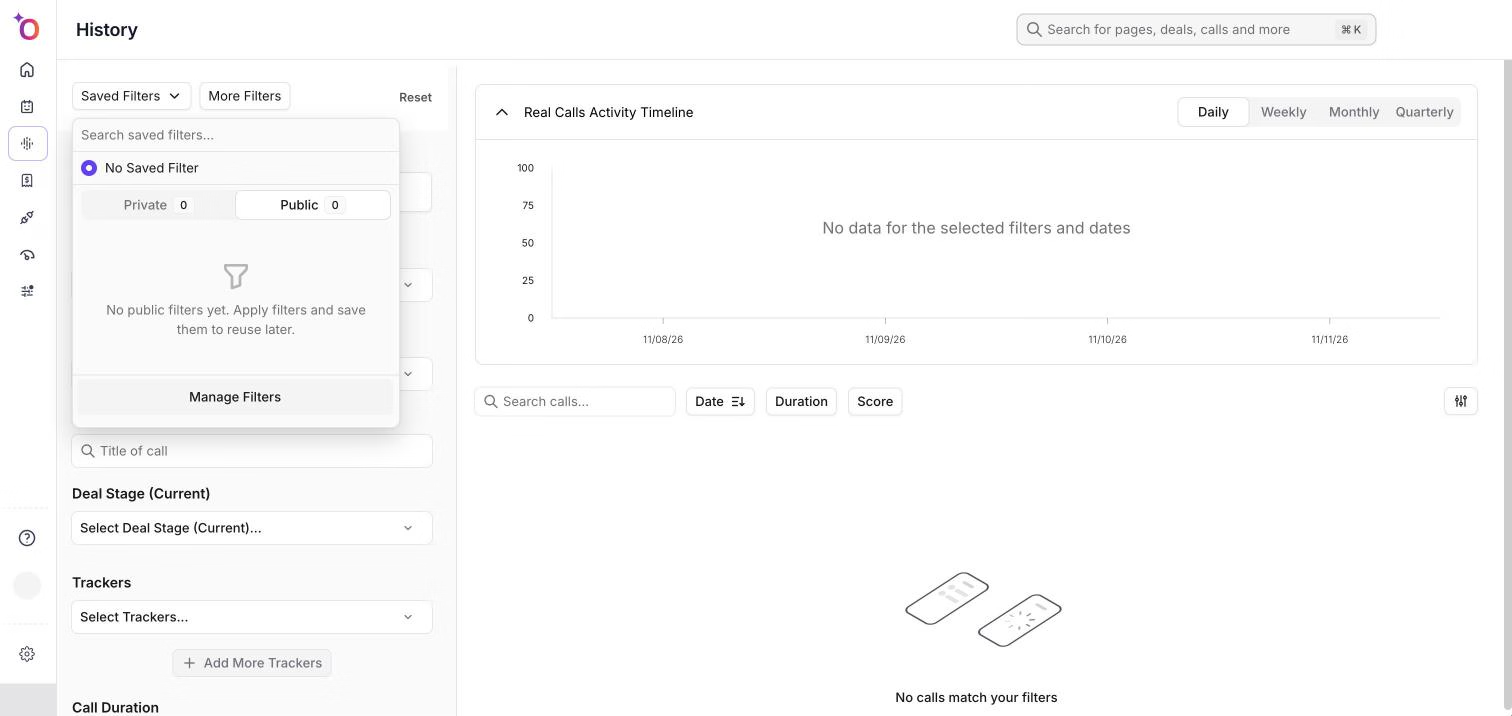
If a list is empty, it says "No private filters yet" or "No public filters yet" and suggests you apply filters and save them to reuse later.
Edit what a saved filter shows
- Apply the saved filter.
- Change the filters in the panel.
- Click Save Filter Changes at the bottom of the panel.
- In the Edit Filter window, check the name, description, privacy and alerts, then click Save Changes.
The saved filter is updated with your current filters. It does not create a second filter.
Manage your saved filters
- Click Saved Filters, then Manage Filters at the bottom of the list.
- In the Manage Filters window, switch between Private and Public. Each tab shows how many filters it holds.
- Use Search filters by name... to find one.
The table shows the Filter Name and who created it. It also shows whether Alerts and Private Filter are on for each filter, and whether alerts go to email or Slack. These are display only. To change them, edit the filter.
Edit a filter
Click a filter name, or hover over its row and click the pencil icon. The Edit Filter window opens with the current name, description, privacy and alerts. Make your changes and click Save Changes.
Delete a filter
- Hover over the row and click the trash icon.
- In the Delete Item window, read "Delete this item? This can't be undone."
- Click Delete, or Cancel to keep it.
If a filter can't be deleted, an error message tells you to try again.
Saved filters on performance pages
The Saved Filters list also appears on a team member's Real Calls performance pages. Applying a filter there narrows the numbers to calls that match it, and a "Selected Filter" tag shows its name. Click the X on the tag to remove it. See Read Real Calls Performance for a Team Member.
Hope this article was helpful. For any queries, please write to support@outdoo.ai